Attachable Walker Accessories (for Carrying Bags, Bowls and Cups)
1. The Design Challenge
Our client lives alone in a one-bedroom apartment on the ground floor and uses his car to go to local stores for shopping and groceries. He accomplishes all his daily activities independently and uses a walker for mobility. He approached us with some ideas for walker attachments that would allow him to accomplish his daily activities easier and more efficiently.
General difficulty: carrying items while both hands are occupied using the walker.
More specifically:
- Carrying soup and a cup on a tray attached to the walker without spilling the contents of the dishes.
- Carrying grocery bags while using his walker when out shopping.
- Transporting grocery bags from his car to his apartment.
The context:
- Few walker accessories exist and the ones that do are not ideal (flimsy, hard for the user to attach and remove, expensive, unrealistic/unsafe).
- Walkers are designed for a single purpose: safe walking.
- Most walker designs do not account for participation in other activities performed concurrently while walking (such as carrying items).
- There is market demand for walker attachments.
- The client had already tried using carabiners, but found that they were too small and difficult to manipulate.
2. Prototypes and Experiments
Our client initially came to us with three ideas for three different products to help him with his areas of concern:
- Bag Hooks: Hooks that he could attach to the frame of his walker from which he could hang reusable grocery bags.
- No-Spill Tray: Some sort of modification to his existing walker tray that would keep cups and bowls from spilling.
- Bottom Walker Tray: A shelf that he could place on the lower bars of his walker frame which he could place grocery bags on when transporting them from his car.
What follows is our design evolution for each of the three initial product concepts.
2.1. Walker Hooks for Grocery Bags
Upon researching existing products, we found that many hooks were on the market that were designed to be attached to stroller handles. We felt that these could be used without many modifications for walkers as well.
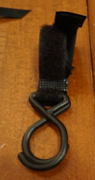
We originally tried these smaller double hooks with a velcro part that could attach to the walker. The double hooks were not needed, too much weight caused them to bend, and the hook was not deep enough to properly secure the bag.
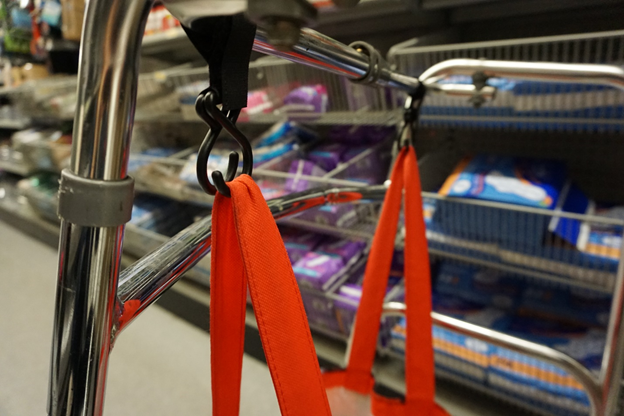
We then tested out a second product, a larger hook with Velcro attachment which was a success (see final solution).
2.2. No-Spill Tray Accessories
From early in the design process, we found that there were two problems that resulted in liquid spillage from bowls and cups. The first was that an unstable base led to cups and bowls moving around the tray and sometimes tipping over while the walker was in motion. The second was that the movement of the bowls and cups caused the liquid to slosh over the sides of their containers.
We decided that a combination of two different solutions to deal with each of these problems was the best approach - a device to stabilize the vessels and a device to contain the liquid. An important design element was that we needed to create a device that accommodated our client’s existing dishes that came in various sizes and shapes. Although it is possible to purchase specialized cups and bowls that come with lids and are designed to not spill, we could not find any products on the market that were designed to accommodate the types of bowls and cups that most people have in their cupboards.
2.2 Product 1: Cup and Bowl Holders
We had many initial ideas as to a no-spill cup holder. We considered building some sort of gyroscopic or self-stabilizing mechanism, but realized that no mechanism would be responsive enough to accommodate for jerky and inconsistent forces being exerted on the dishes. We next considered building indentations into the tray to place the dishes in, but felt that this would limit the tray’s versatility as a tool since our client uses it for other purposes apart from just transporting bowls and cups. We next considered attaching elastics to the tray, but felt that they would still not provide enough support to stabilize the dishes, and would be difficult for our client to manipulate from a fine motor perspective.
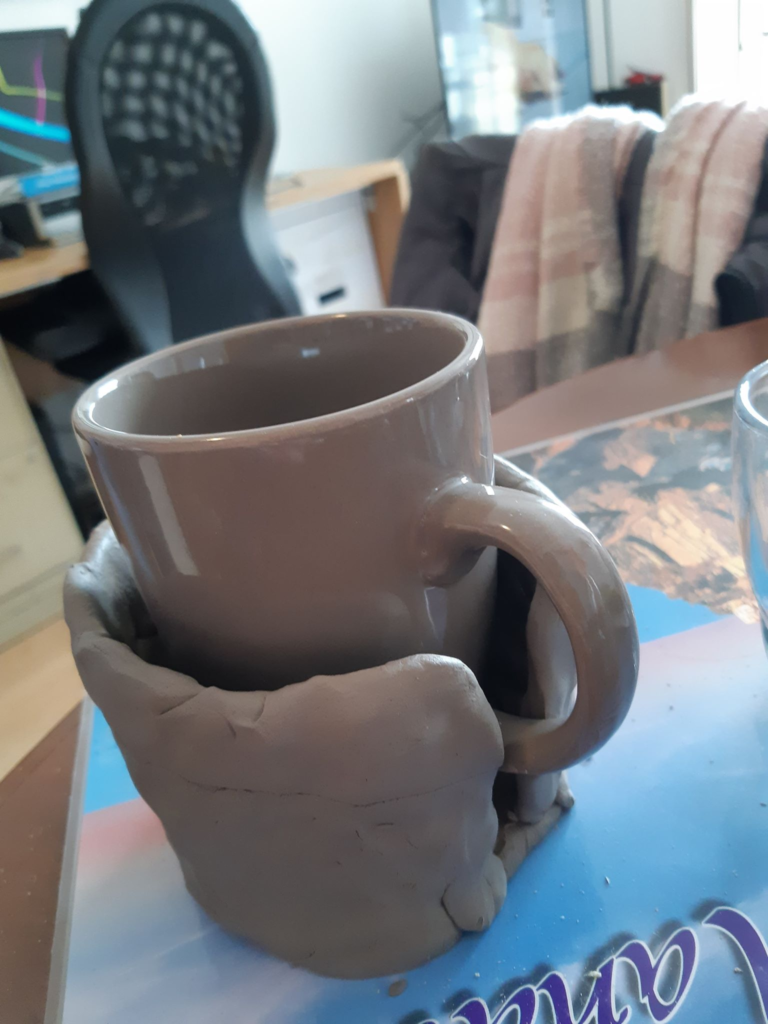
We finally settled on a removable cup holder that could be customized in size and could be attached and removed from the walker tray as needed.
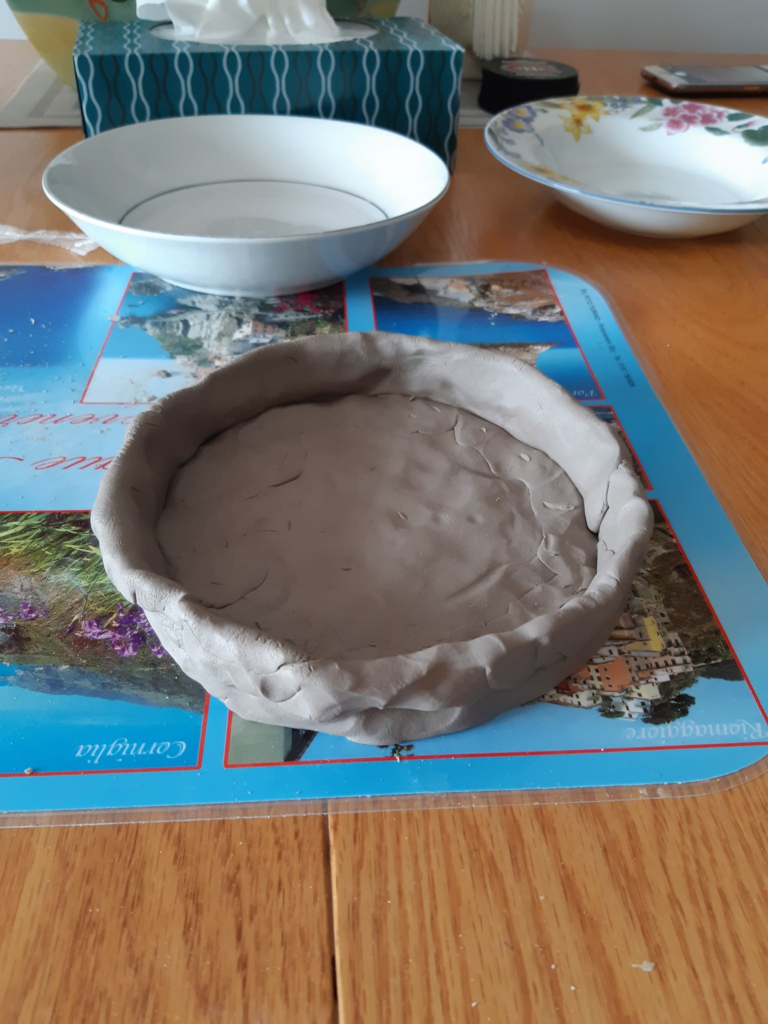
The initial prototypes were made with modelling clay to obtain the size of the cup and bowl holders and for initial concept testing. The next prototypes were 3D printed in clear resin. The bottom was sanded for better adherence to the suction cup. However, since it still did not adhere sufficiently to the suction cup mat, varnish was added to the base.
2.2 Product 2: Bowl and Cup Lids
Upon initial market research, we discovered that many silicone lids of variable sizes were on the market. We had our client trial one of the most popular brands. However, he found the lids too difficult to attach from a fine motor perspective, a difficulty that we found we also had when trying the same.
We then found a less-popular market available silicone lid design, which simply lay flat on top of the cups, and therefore did not require fine motor manipulation. This became our final solution for the cups.
Initially, we hoped to use the same type of silicone lid for the bowls as for the cups since they worked very well on the cups. However, because the mouths of the bowls were of greater diameter than the cups, the flat silicone lids did not create a seal because they were not heavy enough. Therefore, we had to find a different solution for the bowl lid.
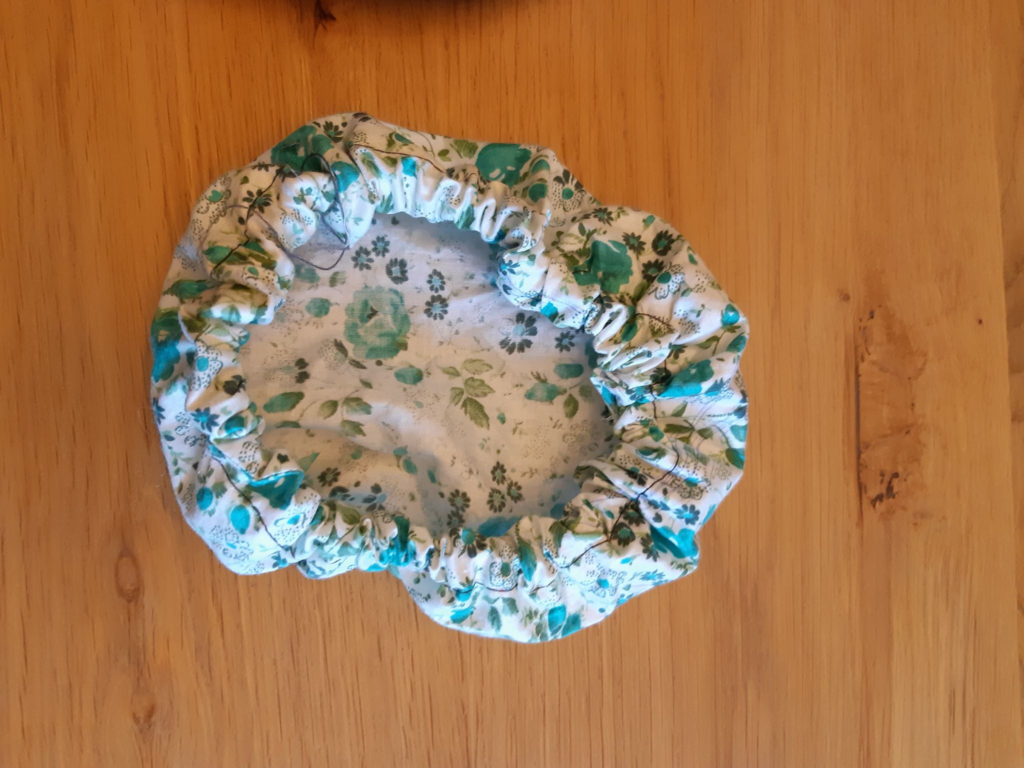
For the bowl lid, we made two prototypes using fabric: one with an elastic edge, and a drawstring one with a cord stopper. The client suggested merging the two designs to create an elastic drawstring so the manipulation would be easier. The final product would be made with a PUL fabric inner later, making it waterproof and ideal for soups.

2.3 Bottom Tray to carry groceries
During the first meeting with our client, he asked us to design 3 products for his walker, one of which was the “Bottom Tray,” to transport his groceries from his car to his apartment hands-free. Another modification that our client asked for was hooks to hang grocery bags from his walker.
As it was explained by our client and as our team initially understood it, these were two distinct problems that required two different solutions.
Our team found suitable hooks and attached two of them to our client’s walker early on in the design project (described above). Our client used the hooks often, even when grocery shopping, and was able to hang 2-3 bags off each hook. When it came time to design and prototype the Bottom Tray, we first created a simple, low fidelity prototype of the tray with a black bristle board. The goal of this prototype was to ensure that the device did not block our client’s view and create a less safe environment. However, the prototype also allowed us to test the number of bags that we could place on the tray, which ended up being two.

From our trials with this prototype and talking with our client, we learned that he was already using the hooks that we had purchased to transport his bags from his car to the apartment and therefore the hooks had solved not only one, but two needs for the walker modifications. Furthermore, the hooks allowed him to carry 4-6 grocery bags, compared to the tray, which would have only allowed him to carry 2 bags. It was for these reasons that we understood we were designing a complex prototype to solve a problem for which we already had a solution. In addition, our client was so enjoying the hooks and using them so frequently, that he had already ordered four more.
3. The Final Solution
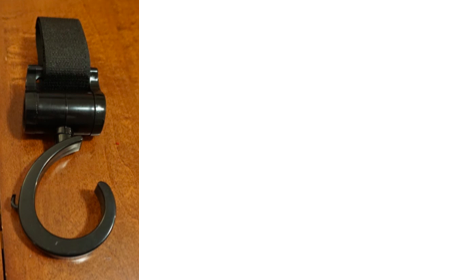
3.1. Walker Bag Hooks:
The final hooks chosen are pictured below. They are larger than the first solution, with the velcro component to attach to the hooks easily to the walker. Our client uses two to hold up his grocery bags. We also tested multiple reusable bags in order to find ones that would not be too long and therefore drag on the ground as he shopped.

3.2. No-Spill Tray Accessories:
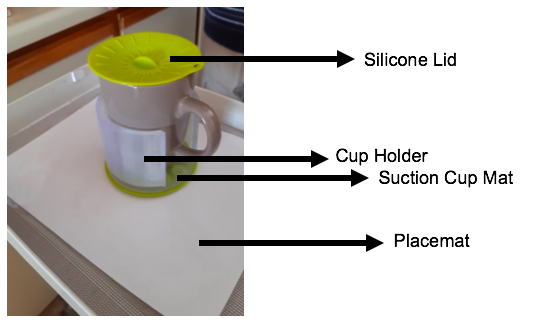

Our final design solution is composed of five components:
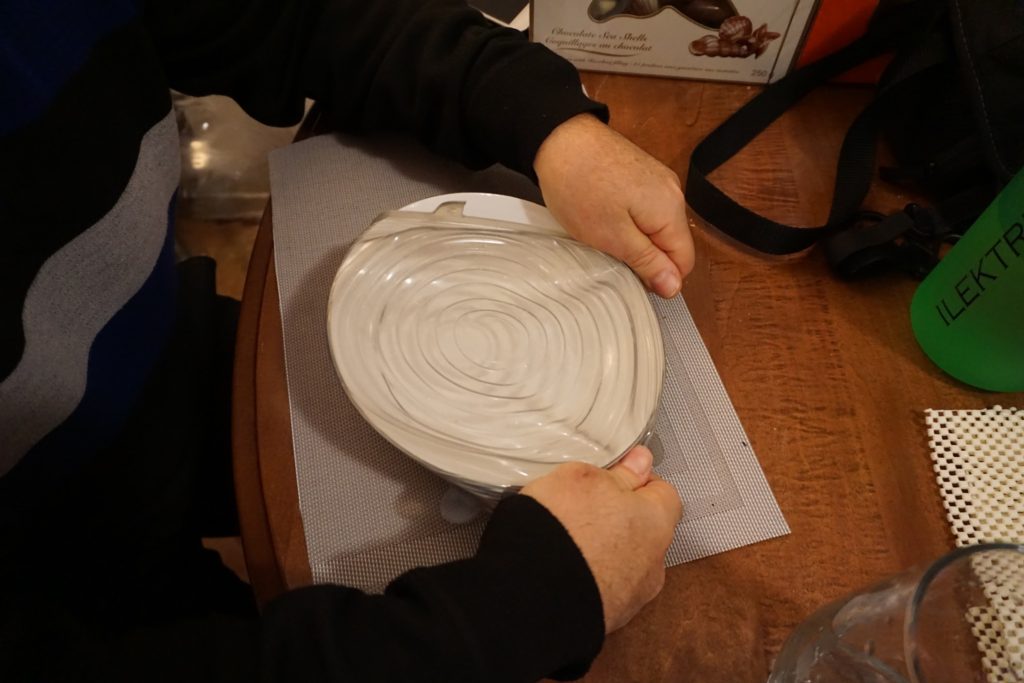
- At the very bottom, there is a placement that will allow all the suction cup mat to adhere.
- On the placemat, we attach a suction cup mat that keeps the cups/bowl holder in place.
- The 3D printed cup holder goes on top of the suction cup mat and has a slit for the handle. The cup holder was sanded and varnished to allow it to adhere to the suction cup mat. The design for the bowl holder is similar to the one for the cups. However, the bowl holder has different dimensions and no slit to accomodate a handle.
- For cups the silicone lid keeps the liquid from spilling over.
- For bowls a homemade waterproofed fabric lid (PUL fabric waterproof liner) with elastic drawstring and a cord stopper keeps bowl contents from spilling.
4. Fabrication and Usage Instructions
4.1. Walker Bag Hooks:
These were purchased from Amazon.com and used without modifications. See below for brand details and resources.
4.2. No-Spill Tray Components
- Silicone Cup Lid & Suction Cup Mat Attachments
Both of these components were purchased and used without modifications. See below for product details and purchasing resources.
- Bowl Lid
These can be hand or machine sewn. The process to be followed is similar to the process used when sewing a drawstring bag. See below for detailed material list and purchasing resources.
Instructions:
Assemble required materials and tools: Sewing scissors, thread and needle (or sewing machine), elastic cord, cord stopper, PUL fabric lining, and top layer fabric. The hole in the cord stopper should be greater than the diameter of the elastic cord (if two holes) or greater than two times the diameter of the cord (if one hole).
i) Cut a circle of cloth out of your chosen PUL fabric. Circle should be about 4-5” larger than the diameter of bowl

ii) Cut a circle of the same size from your fabric of choice that will function as your top layer.
iii) Measure and cut your elastic drawstring cord. It should be long enough to go around the circumference of your fabric circles with at least a 4” tail. To calculate the circumference of the fabric:
C = 2*𝜋*(radius of circle) = 2*3.14*(radius of circle).
iv) Place your two fabrics on top of each other: the top layer fabric should be placed facing downwards, while the shiny side of the PUL fabric should face upwards. Fold the edges over by about 0.5-1” and sew a “pocket” around the circumference of the fabric. Remember to leave a gap where you will thread through the elastic cord.

v) Attach a safety pin to one side of your elastic. Use the safety pin to help work your elastic all the way through the pocket you have created.
vi) Attach your cord stopper to the two elastic tails, then tie a knot in the end of the elastic cord tails to avoid losing the cord stopper.

-
- Laminated Placemat
This can be made on any home or office printer and laminator. If you do not have access to these, printing and laminating can be performed at Bureau en Gros.
- Print an image of your choice on a paper slightly smaller than the size of your walker tray.
- Laminate this image and cut it to the size of the tray.
- Cup and Bowl Holder
The cup and bowl holders were 3D printed. For resources for 3D printing, see below. An overview of the steps required are as follows:
i) Modify the provided CAD files as desired to create a cup/bowl holder that will fit your needs (see below for detailed instructions for TinkerCAD if you would like to modify our design to fit bowls and cups of different diameters, or use your favourite CADing software).
ii) Upload final CAD file designs to the 3D printer or send files to a 3D printing company of choice.
iii) When the 3D printed product is finished, use scissors or shears to clip away excess printed material.
iv) Using coarse grain sandpaper (example: 600-grit), sand down any residual excess material left from 3D printing and smooth the bottom surface of the holder.
v) Using the coarse grain sandpaper, sand the bottom of the holder with the sandpaper and water.
vi) Using fine grained sandpaper (example: 2000-grit), sand down any rough surfaces, paying particular attention to the bottom of the holder. This surface must be very smoothly sanded to allow it to adhere to the suction cup mat.
vii) After the holder has been sanded, rinse the surfaces well to remove any unwanted particles or dust, and let the object dry completely.
viii) Coat the bottom surface of the holder with varnish to increase the ability for the base to adhere to the suction cup mat. The sides of the holder can also be varnished if desired. Be sure to use semi-gloss or glossy varnish. An example of varnish is: Minwax Fast-Drying Polyurethane Clear Semi-Gloss, Aerosol.
ix) Let the coat of varnish dry completely before testing the ability of the holder to adhere to the suction cup mat. Steps viii) and ix) may need to be repeated multiple times (at least 2-3 times), depending on the varnish being used, until desired surface finish is achieved to ensure a smooth bottom surface.
**A note on 3D printing
For this prototype, the cup and bowl holders were printed on a Formlabs Form 2 printer, in clear resin. This printer was chosen as our team had free access to it at McGill University. This printer creates a very smooth surface for the print, which is ideal for the design. However, this is a more expensive printer to use.
If a different material and 3D printer is used, the surfaces may not be as smooth. Therefore, it should be noted that more time and effort may need to be put in to sand the bottom surface of the cup and bowl holders to make them smooth enough to adhere to the suction cup mat.

4.3. Tinkercad instructions to modify the CAD files:
See document “TinkerCAD-Instructions”
- Required Materials for the Final Prototype
| ITEM | PRICE (excluding taxes and shipping costs) | VENDOR | NOTES AND LINKS |
| Baby Stroller Hooks | 12.99$ (pack of 2) | Amazon | https://www.amazon.ca/gp/product/B07HHXSDVB/ref=ppx_yo_dt_b_asin_title_o06_s00?ie=UTF8&psc=1 |
| Silicone Lids | 23.99$ (pack of 5, various sizes) | Amazon | https://www.amazon.ca/gp/product/B07VKSQD6L/ref=ppx_yo_dt_b_asin_title_o02_s00?ie=UTF8&psc=1 *Note: if you do not plan to use the larger lids on bowls, a package of smaller lids only can be purchased, such as the link below, by searching “Silicone cup lids” on Amazon: https://www.amazon.ca/ME-Fan-Silicone-Cup-Lids/dp/B07MSFSYGJ/ref=sr_1_30?keywords=silicon+cup+lids&qid=1586272935&sr=8-30 |
| Placemat | Approximate price for laminating: 2-4$ *Note: price may vary depending on the size of the tray | Bureau en Gros / Staples (to laminate and print if needed) | Print an image of your choice on a paper slightly smaller than the size of your walker tray. Laminate this image and cut it to the size of the tray. |
| Suction cup mat | 7.39$ | Amazon | https://www.amazon.ca/gp/product/B07CYW7ZGN/ref=ppx_yo_dt_b_asin_image_o02_s00?ie=UTF8&psc=1 |
| Bowl lid | PUL fabric: 20-25$/meter Elastic cord: 1-3$/meter Cord stopper: 7.99$/20 pieces | PUL fabric: FabricvilleClub Tissus Elastic cord: FabricvilleAmazon Cord stopper: Amazon Fabric for top layer: Choose any fabric for the top layer. This can be scrap fabric from home, or fabric from your local suppliers, craft stores, Amazon, etc.For our project, we used material from an old apron. | PUL fabric (waterproof) example: https://fabricville.com/en/solid-diaper-fabric-royal.html *Be sure to buy PUL material that satisfies food safety regulations. Elastic cord example: https://www.amazon.ca/gp/product/B079JX1DN8/ref=ppx_yo_dt_b_asin_image_o01_s00?ie=UTF8&psc=1 Cord stopper example: https://www.amazon.ca/gp/product/B078LYKZRY/ref=ppx_yo_dt_b_asin_image_o01_s00?ie=UTF8&psc=1 Instructions for washing: Machine washable, lay flat to dry |
| Cup and bowl holders (3D prints) | Price depends on your local 3D print shop. | Local 3D print shop. Some examples are included below. | Tinkercad (see instructions and attached .STL files) Price depends on where you get it manufactured. Please contact your local 3D printer for a quote. |
6. Helpful Contacts and Resources
6.1. 3D printing services
It is best to contact your local 3D printing services to get a quote for the pieces you want to print. Here is a list of 3D printing services in the Montreal area:
- MRKLAB: https://www.facebook.com/mkrlabmtl/
- Fab Lab echoFab: https://www.echofab.quebec/en/
- District 3 Innovation Center: http://d3center.ca
You can also search for other options by looking up: “3D printing Montreal”, or by including your location. This link can also help get you started in your search for 3D printing services: https://www.fablabs.io/
If you are not in the Montreal area or want to look into other options, here is a list of 3D printing services that you can purchase from online:
- Shapeways: https://www.shapeways.com/
- Fablab: https://www.fablabinc.com/en
- 3dhubs: https://www.3dhubs.com/